• Skip to primary navigation
  • Skip to main content
  • Skip to primary sidebar
Sidewalk Shoes
  • Home
  • Recipes
    • Food Recipes Index
    • Cocktails Recipes Index
    • All Recipes
  • Lifestyle
    • Gardening
    • Travels
      • North Carolina
      • Oregon
      • Tennessee
  • Cats
  • Subscribe
  • Nav Social Menu

    • Facebook
    • Instagram
    • Pinterest
    • Twitter
menu icon
go to homepage
subscribe
search icon
Homepage link
  • Food
  • Cocktails
  • Collections
  • Travels
  • Cats
    • Facebook
    • Instagram
    • Pinterest
  • ×
    Home

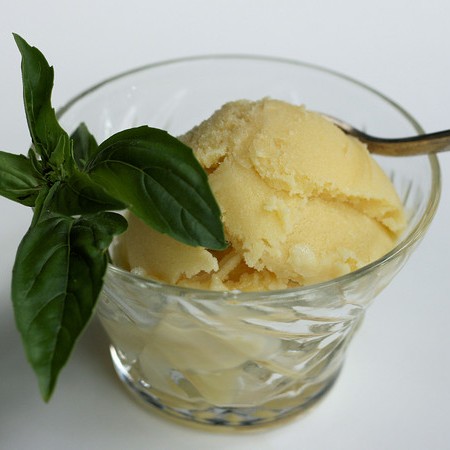
    Mango Sorbet

    Mango Sorbet

    Oct 1, 2009 · 18 Comments

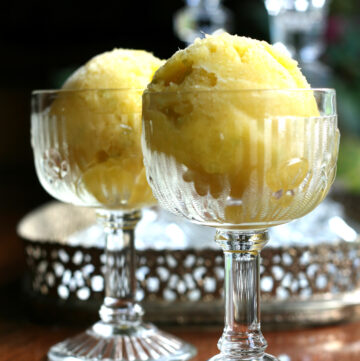
    Close up of mango sorbet in two antique glasses.

    This mango sorbet makes the perfect light and refreshing dessert! You'll want to make it whenever mangoes go on sale! It's like a tropical vacation.

    Two antique glasses filled with bright yellow mango sorbet.

    We are big believers in desserts around this house. We like to finish off our meal with something a little sweet.

    If possible, I like to include fruit in our desserts, makes it a bit healthier, don't you think?

    According to the American Heart Association, the mango is a luscious superhero of the fruit world!

    ...
    Read On →

    Colonoscopy 101

    Sep 27, 2009 · 45 Comments

    Make your bathroom pretty, you'll be in there a lot for your Colonoscopy prep

    Colonoscopy 101

    I'd like to interrupt my regularly scheduled blog post with a Public Service Announcement. One of the joys of getting older is that every time you visit the doctor, there is a new list of preventative tests and procedures. I've been having my boobs smashed for years, but when you turn 50, colonoscopy floats to the top of the list. I know it's not pleasant, but hey, we like to eat and drink and play, and we want to stay as healthy as possible, right.

    ...

    Read On →

    Thai Chicken Noodle Bowl

    Sep 11, 2009 · 30 Comments

    Close up of Thai Chicken Noodle Bowl

    This Thai Chicken Noodle Bowl is the easy dinner that you'll put into regular rotation! With shredded cooked chicken, red onions, cucumbers, tomatoes, and noodles in a tangy Thai inspired sauce!

    Two bowls with noodles, cherry tomatoes, cucumbers, and chicken.

    I love having easy recipes to get dinner on the table quickly. Especially when they are Thai-inspired, a favorite around here!

    Using a rotisserie chicken, or some simple Poached Chicken, makes this even easier! I used some chicken that I had canned, so mine came out very shredded!

    The bright fresh flavors of this noodle bowl will have you coming back for more!

    ...

    Read On →

    Tyler Florence Roasted Peppers in Olive Oil

    Sep 10, 2009 · 23 Comments

    Yay! I am happy to be back with Tyler this week! Unfortunately between school commitments and the fact that I am having to cook with a set of ingredients from my CSA, I don't have much time to search out Tyler's recipes that fit those specifications. It seems like every week, I get tomatoes, eggplants and peppers. Over and over. They are all good, mind you, it's just that this whole eating local thing can get a little dreary at times. But pretty soon, I'm sure the cooler fall crops will kick in and I'll be complaining about too much butternut squash.

    So, anyway, let me stop my whining, and start my praising. Because Tyler's Roasted Peppers in Olive Oil is oh-so-praiseworthy. These were wonderful, everything that I want in roasted peppers. I served them on top of some grilled brats...Heaven. Then the next day, I added them to a quesadilla...Heaven The Sequel. Seriously a bowl of these in your fridge and you are good to go, in just about any direction.

    The only modifications that I made were to use a mixture of peppers and to roast them all at once under the broiler. They don't roast as evenly, but I don't care. Ease of use trumps evenness every time.

    Roasted Peppers in Olive Oil

    6 red bell peppers
    ½ bunch fresh oregano
    2 cloves garlic, sliced
    ¼ cup extra-virgin olive oil
    2 tablespoons red wine vinegar
    Kosher salt and freshly ground black pepper

    Place the peppers directly onto the burners of a gas stove. Cook the peppers, turning frequently, until they are charred on all sides. Put the peppers into a bowl, cover with plastic wrap, and let them steam for about 15 minutes. (If you do not have a gas stove preheat your oven to 400 degrees F. Coat the peppers with some olive oil and place them on a baking sheet. Cook the peppers until they are soft and have collapsed, about 1 hour. Set the peppers aside until they are cool enough to handle.)

    Peel, stem, and seed the peppers; cut them into wide strips. Place the warm pepper strips into a shallow serving dish. Top with the oregano, garlic, olive oil, and vinegar. Season them with salt and pepper and mix them gently to combine the flavors. Let them sit to cool and serve at room temperature.

    This will be my entry for this week's Tyler Florence Fridays.

    Orzo Cucumber Salad with Mint and Oregano

    Sep 7, 2009 · 21 Comments

    Remember back when I pledged to buy no more cookbooks? Well, I am proud to say that I have stuck to my pledge. Since I have no new treats to look through, I am starting to spend time perusing old favorites, and those books that I just had to have, but then managed to never cook from. The Flavor Bible: The Essential Guide to Culinary Creativity, Based on the Wisdom of America's Most Imaginative Chefs was one of those books.

    Have you seen this book, or looked through it? It's not a cookbook, it's really what it says it is, a flavor bible. A place to go to see what goes with what. I've been wanting to be a little more creative and loose with my cooking and this book allows you to do that, with a few helpful guidelines. Wanting to make some sort of side dish using cucumbers, I looked them up in the book. One of the pairings suggested was: cucumbers, garlic, mint, oregano, olive oil, and red wine vinegar. Sounded good to me, so I took those ingredients, added some pasta, and had this lovely pasta salad!

    Orzo Cucumber Salad with Mint and Oregano
    Serves 4

    1 cup orzo
    1 clove garlic, minced
    ¼ cup mint, chopped
    ¼ cup oregano, chopped
    2 cups diced cucumbers
    ¼ cup olive oil
    2 tablespoons red wine vinegar
    salt and pepper to taste

    Cook orzo pure directions and drain. Mince garlic and add to bowl. Spoon hot orzo over the garlic, to cook the garlic a bit. Let it sit, while you chop the herbs and cucumbers. Add the herbs and cucumbers to the orzo. Pour over the olive oil and vinegar (you can whisk it to an emulsion first if you'd like, I usually don't bother). Season with salt and pepper to taste. Serve at room temperature.

    This herby pasta salad will be my entry for this week's Presto Pasta Nights hosted by Rachel at The Crispy Cook.

    Senior Kitty Scrappy on her Favorite Iron Bed

    Sep 5, 2009 · 8 Comments

    Senior black and white cat on an old iron bed with a vintage quilt.

    Senior Cat, Scrappy, on her favorite antique iron bed and vintage quilt!

    Three of my favorite old things: Scrappycat, quilts and iron beds.

    Zuni Cafe Zucchini Pickles

    Aug 27, 2009 · 17 Comments

    Jar of bright yellow pickled zucchini.

    These Zuni Cafe Pickles are a classic for a reason, quick pickled zucchini with a sweet sour flavor and bright yellow coloring! Like a jar full of sunshine!

    Jar of bright yellow pickled zucchini.

    I first made these Zuni Cafe Pickles back in 2009! I make them every single year and there really is no excuse for them sitting here all this time with no images and no recipe card!

    Zuni Cafe is a restaurant in San Francisco, which opened in 1979. I've never been there, but when I got their cookbook in 2003 I fell in love with practically every single recipe.

    One of the first recipes that I tried from the book was their Zuni Cafe Pickles.

    These quick pickled cucumbers and zucchini are brined in a sweet and sour brine, with turmeric giving them a gorgeous yellow color.

    They are so good and I always have a jar in my fridge.

    ...

    Read On →

    Jalapeno Mint Jelly

    Aug 14, 2009 · 33 Comments

    Isn't there something so wonderful about a pantry lined with jars of food that you canned yourself? I know it's time consuming, but it is so rewarding to hear that lovely ping sound as each jar seals. Plus I get to use my cute enameled pot that I use for canning.

    Since my mint is flourishing, and really, is there any time mint is not flourishing, I decided to make some jalapeno mint jelly. This stuff is wonderful brushed on chicken or lamb, and spooned on some crackers with some cheese, it's an instant appetizer.

    This recipe came from The Complete Book of Small-Batch Preserving: Over 300 Recipes to Use Year-Round my favorite canning book because it has recipes that are the size I can manage. No 20 pounds of anything for me, please. Now, I am only posting the recipe here, to get complete safety and canning instructions, there are plenty of websites, or better yet, get this book and then you have canning instructions and over 300 recipes!!

    Jalapeno Mint Jelly
    Makes 4 cups

    1 ¾ cup finely chopped fresh mint, divided
    1 ½ cups water
    3 ½ cups granulated sugar
    ¾ cup cider vinegar
    2 tablespoons strained fresh lemon juice
    2 jalapeno peppers, finely chopped
    1 pouch liquid fruit pectin

    Bring 1 ½ cups mint and water to a boil in a small saucepan. Remove from heat, cover and let stand for 30 minutes to steep. Strain through a lined sieve pressing with the back of a spoon to extract as much liquid as possible; discard mint.

    Combine mint liquid, sugar, vinegar, lemon juice and peppers in a large stainless steel or enamel saucepan. Bring to a full boil over high heat and boil hard fro 2 minutes, stirring constantly. Remove from heat; stir in pectin and remaining mint.

    Ladle into sterilized jars and process in a boiling water canner for 5 minutes. (There's more to processing than this, so please read complete canning instructions!)

    Ina's Chicken Salad Sandwiches

    Aug 12, 2009 · 19 Comments

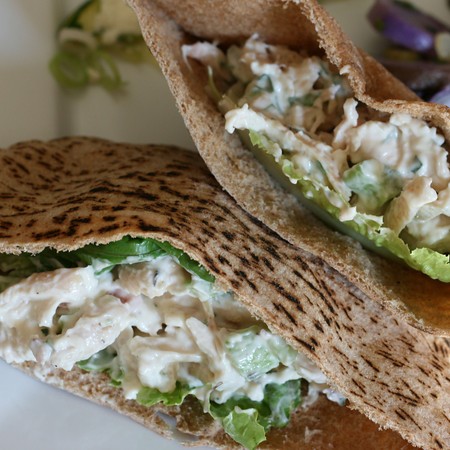
    Okay, you all know that I spatchcock a chicken every week. You all know that because I love reminding you every chance I get. And like I said before, cooked chicken in fridge = gold. Well, I need to change that. What is better than gold? Platinum? I don't know, but I loved this recipe so much, that this week, I'm spatchcocking two chickens. Really, that's a no-brainer, isn't it, double the chicken, with practically no extra effort. Because I think I may need to take this salad to work every day this week. I think I have to. It's the law, right up there with azaleas and crepe myrtles.

    Chicken Salad Sandwiches
    From
    Barefoot Contessa at Home: Everyday Recipes You'll Make Over and Over Again
    Serves 4 to 5

    4 split (2 whole) chicken breasts, bone in, skin on (or cooked chicken in fridge)
    good olive oil, salt and pepper
    ¾ cup good mayo
    1 ½ tablespoons fresh tarragon leaves
    1 cup small-diced celery (2 stalks)

    Preheat the oven to 350.

    Place the chicken skin side up on a sheet pan and rub them with olive oil. Sprinkle generously with the salt and pepper. Roast for 30 to 40 minutes, until the chicken is cooked and then set aside to cool.

    When the chicken is cool, remove and discard the skin and bones and cut the chicken into a ¾ inch dice. Combine the chicken, mayo, tarragon, celery, 2 teaspoons salt, and 1 teaspoon pepper in a bowl. Mix well.

    Serve on bread (or pitas) with more mayo spread on the bread and lettuce.

    Fish Roasted on Fennel Fronds

    Aug 7, 2009 · 9 Comments

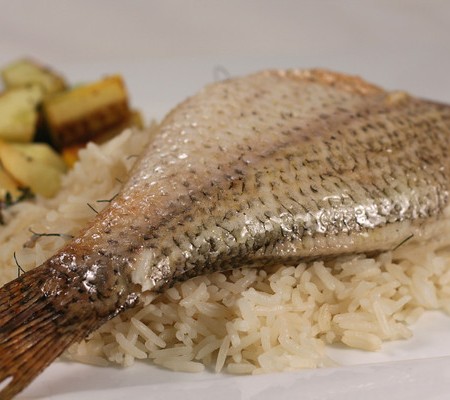
    Did you know that there are two types of fennel? Well, there are! There is the bulb kind that you eat as a vegetable, and then there is the herb kind that get really tall and you use the fronds, flowers, seeds, and pollen from. When I bought my fennel, I planted it in my herb bed, which was a good thing, since it was the herby fennel. I don't really use it much, just admire it's lacy fronds, and that's about all. But I've seen or heard about roasting fish on it or wrapped in it and I've always wanted to give that a try.

    I had some mystery fish that my son-in-law had caught. When I pulled them out of the freezer, I realized that they hadn't been cleaned. If anyone follows me on Twitter, I tweeted one day about fish scales everywhere. These were the culprits. Cleaning fish is messy. Hours later, fish scales were still falling from my hair like snowflakes.

    So, anyway, stop the complaining and back to the fish. I used a simple marinade and then just roasted them on the fennel fronds spread out on a cookie sheet. It was lovely. Really. The fennel just sort of perfumed the fish. And I felt very chef-ish while I was doing it, which is always a plus!

    Fish Roasted on Fennel Fronds
    Serves 4

    4 fish, preferably cleaned by someone other than yourself
    ½ cup fresh lemon juice
    ½ cup olive oil
    1 teaspoon salt
    1 teaspoon chopped fresh thyme
    fennel fronds
    olive oil

    Combine the lemon juice, olive oil, salt and fresh thyme in a shallow dish large enough to old the fish and whisk together. Add the fish and turn to coat. Cover and refrigerate for about an hour.

    Preheat oven to 500. Place fennel fronds on baking sheet and spread out in a thin layer. Sprinkle with a little water and a little olive oil. Place fish on top. Roast fish in the middle rack of your oven for about 10 minutes per inch (mine took about 20 minutes) or until cooked through.

    This will be my entry for this week's Weekend Herb Blogging hosted by Dhanggit at Dhanggit's Kitchen.

    Freezer Cucumbers

    Aug 5, 2009 · 13 Comments

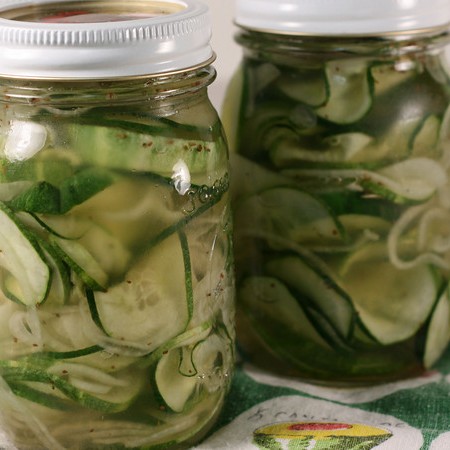
    Last April, I opened a jar of freezer cucumbers that I had frozen the previous summer. Some of you may remember that post. They were wonderful and crisp. Though you do need to eat them within a couple of days after opening and refrigerating them, because they don't stay crisp long. But they are so good, that should not be a problem.

    I thought that it would be wise to mention it again, as some of you may have an abundance of cucumbers right about now. I tried to grow cucumbers this year, but alas, apparently I can grow herbs and flowers, but not cucumbers. Luckily for me, however, my CSA can.

    I am reposting the recipe because last year I did not include onions, which were suggested. But since I've oodles and oodles of onions (another thing my CSA excels at), I included them.

    Freezer Cucumbers

    7 cup thinly sliced cucumbers
    3 medium onions, thinly sliced
    2 cup sugar
    1 cup vinegar
    ½ teaspoon celery seed
    1 tablespoon salt

    Mix all ingredients in a large bowl. Refrigerate for 24 hours. Put into freezer containers.

    Just defrost to serve.

    Tyler Florence - Chili Cheese Dogs

    Jul 23, 2009 · 20 Comments

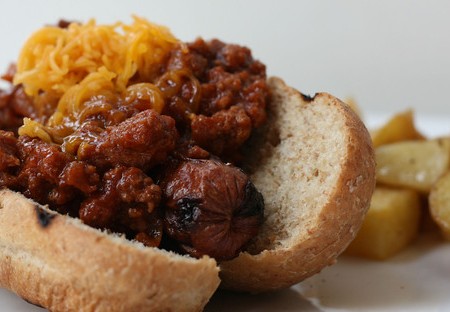
    After eating light and healthy for several days in a row (it's funny what an upcoming physical appointment with a doctor will do for your eating and drinking habits), it was time for something not so light and healthy. So, when I want to splurge, I go for beef and cheese. Beef and cheese does it for me everytime (and since the cholesterol results came back fine, bring it on!). But instead of my usual burger, I opted for another American classic, the chili cheese dog.

    I love a good chili cheese dog, from the tiny chili cheese pups from Krystals, to the footlong from Sonic, to the really good ones at the those fancy hot dog stands. So, Tyler's Chili Cheese Dogs from Eat This Book: Cooking with Global Fresh Flavorssounded like a dream come true.

    These were good, just what I had in mind. Now, the topping felt, and tasted, a little more "Manwichy" than chili to me, but that was okay. Nothing better than a beefy hot dog, topped with more beef, and then topped with cheese. And speaking of healthy, which we were several paragraphs back, these were made with grass-fed beef hot dogs, grass-fed beef hamburger, whole wheat buns, and organic whole milk cheddar from happy grass-fed cows, so I think it was healthy afterall!

    Chili Cheese Dogs
    Serves 4

    ¼ cup extra-virgin olive oil
    1 medium onion, chopped
    1 pound lean ground beef
    1 cup ketchup
    1 teaspoon chili powder
    1 tablespoon prepared yellow mustard
    Kosher salt and freshly ground pepper
    4 all beef hot dogs, about ½ pound
    4 hot dog rolls
    ½ cup shredded Cheddar

    To make the chili: Heat a skillet over medium flame and add 2 tablespoons of olive oil. When the oil gets hazy, add the onion and cook, stirring, until they are soft and translucent, about 5 minutes. Add the ground beef, breaking it up with the back of a spoon, and cook until nicely browned, about 10 minutes. Stir in the ketchup, chili powder, and mustard; simmer for 15 minutes until thick; season with salt and pepper.

    For the hot dogs: While the chili is cooking: place a large grill pan on 2 burners over medium-high heat or preheat an outdoor gas or charcoal barbecue and get it very hot. Brush the grates with oil to keep the hot dogs from sticking. Parboil the dogs first before grilling: bring a pot of water to a boil and cook the hot dogs for about 5 minutes. Remove from the water and grill the hot dogs just long enough to give them grill marks. Brush the insides of the rolls with the remaining oil and place them face down on the grill until toasty. To serve, top each hot dog with the chili and some Cheddar cheese.

    This will be my entry for this week's Tyler Florence Fridays!

    Five Herb Ice Milk

    Jul 17, 2009 · 16 Comments

    When I first told my husband that I was making Five Herb Ice Milk, he looked dubious at best. But being the sometimes wise man that he is, he remained silent on the subject.

    Silence until he was eating it, that is. Then it was moans, and sighs of ecstacy, and exclamations of delight.

    Because, dear, dear reader, this was wonderful. It was beyond wonderful. It was wonderful in that sense of a totally new flavor. I don't know what to compare this too. The sum of all the herbs resulted in an unindentifiable herby flavor, not quite sweet, not quite savory. The best of all, I had all of these herbs flourishing in my herb bed, and some extra milk in the fridge (you know how when you're at the store and you buy milk, cause you don't really know if you need it, and then you get home, and you realize that you, in fact, did not need it).

    I'm not going to bother reposting the recipe, since you can follow the link above to the Epicurious website. Everyone needs to visit the Epicurious website every now and then, or in my case, practically daily!

    This will be my entry for this week's Weekend Herb Blogging hosted by Lynne at Cafe Lynnlu.

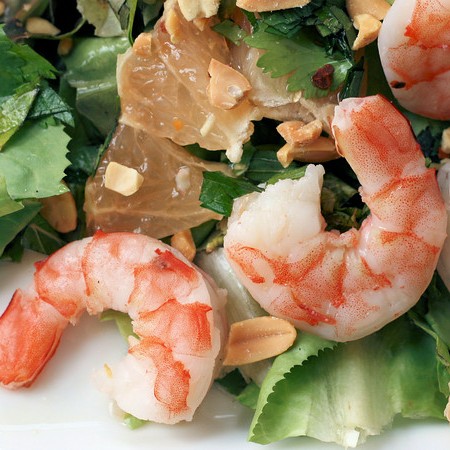
    Southeast Asian Shrimp and Grapefruit Salad

    Jul 15, 2009 · 10 Comments

    I don't mean to toot Mark Bittman's horn twice in week. Normally, I like to spread my chef love around. But when I saw that I had two grapefruits languishing in my produce drawer, and I had long since forgotten why I bought them, I knew what I would use them for.

    This Southeast Asian Shrimp and Grapefruit Salad comes from The Minimalist Cooks Dinner: More Than 100 Recipes for Fast Weeknight Meals and Casual Entertaining. I've made it several times, which should tell you something, because I rarely make the same thing twice. It's quick and easy with fresh Asian flavors.

    Southeast Asian Shrimp and Grapefruit Salad
    Serves 4

    1 to 1 ½ pounds shrimp
    Salt
    3 tablespoons nam pla (fish sauce) or soy sauce
    1 tablespoon sugar
    Juice of 2 limes
    6 cups lettuce or mesclun, washed and dried
    2 grapefruit, peeled and sectioned, tough white pith removed, each section cut in half
    ¼ cup chopped mint
    ¼ cup chopped cilantro
    Minced chilies or dried red pepper flakes, optional
    ½ cup chopped dry-roasted peanuts, optional

    Put shrimp in a saucepan with salted water to cover; bring to a boil, then turn off the heat and let them sit for 5 minutes, or until shrimp are opaque in center. Or you could grill or saute them, salting them as they cook. Cool in refrigerator or under cold running water, then peel (and devein if you like). Cut shrimp in half if they're large.

    Combine nam pla or soy sauce with 2 tablespoons water, sugar and lime juice, and blend or whisk until smooth.

    Arrange the lettuce leaves on the plates and evenly portion out the grapefruit, the shrimp, the mint and the cilantro. Drizzle with the dressing and top with the chilies and peanuts.

    Stuffed Red Bell Peppers

    Jul 13, 2009 · 21 Comments

    I've just figured out why I turn to Marc Bittman's How To Cook Everything: Simple Recipes for Great Food and The Best Recipes in the World. It's not just because the recipes always seem to work and come through for me, though that is good! It's because the odds are pretty good that I'm going to find what I'm looking for.

    So, when I found these absolutely huge and gorgeous red bell peppers, I knew that I wanted to stuff them. Now, I know that I've seen stuffed peppers in many of my cookbooks and magazines, but where? Which one? With just over an hour till dinner, I didn't have time to start pulling books off the shelves. So, I went to Mark. If you can't find it those two huge tomes that I mentioned above, it probably doesn't exist.

    Within minutes, I was reading a recipe for a meat filling, suitable for use in grape leaves, cabbage leaves, peppers and tomatoes. I had everything I needed (though I substituted ground beef for ground lamb). Easy peasy. It was really good, and makes me wonder why I don't stuff more veggies. They come out so pretty!

    Meat Filling for Grape Leaves, Cabbage Leaves, Peppers, and Tomatoes
    Enough to fill 4-6 large tomatoes or peppers, 8 or more cabbage leaves, or upt to 30 or so grape leaves

    2 tablespoons butter or extra-virgin olive oil
    1 large onion, chopped
    salt and black pepper to taste
    ¼ cup long-grain rice
    ¼ teaspoon ground allspice
    ½ teaspoon ground cumin
    ¼ teastppon ground cinnamon
    ¾ pound ground lamb (I used beef)
    ½ cup chopped fresh parsely leaves
    ½ cup chopped fresh dill leaves
    zest of 1 lemon, minced

    Melt the butter in a small saucepan or skillet over medium-high heat. Add the onion and sprinkle with salt and pepper, and cook until it is soft, but not browned, about 5 minutes. Add the rice and the spices, and stir until the rice is glossy, about 1 minute. Add ½ cup of water, cover and turn the heat to low, cook until the liquid is absorbed, this should take about 15 minutes.

    Combine the rice in a bowl with the lamb (or beef), more salt and pepper, the herbs and the lemon zest.

    ***To stuff the peppers: Preheat the oven to 450. Cut off the tops of the peppers and scoop out the insides. Salt and pepper the cavity and then stuff with filling.
    Stand the peppers up in a roasting dish, replacing their cap. Pour about 1 cup of stock and ¼ cup of olive oil into the roasting dish. Roast for 40 minutes.

    Homemade Basil Pesto

    Jul 10, 2009 · 28 Comments

    Pesto
    This Homemade Basil Pesto is so easy, you'll never buy store bought again!  It is keto friendly and can easily be made paleo, whole30, and vegan by not adding the cheese before serving!
    Post may contain affiliate links, full disclosure on sidebar.
    basil leaves with a jar of homemade pesto text overlay reading homemade basil pesto

    Harvesting Basil

    Did you know that you are supposed to harvest your basil regularly?  If you are one of those that just goes out and takes a snip every now and then, you are doing it all wrong.

    First of all you should be Propagating Your Basil and on top of that regularly harvesting it actually makes it grow more and stronger!  I harvest my basil typically at the end of June, July, August and September.  Then the question is what to do with all that basil.  Easy peasy.  Homemade Basil Pesto.

    ...

    Read On →

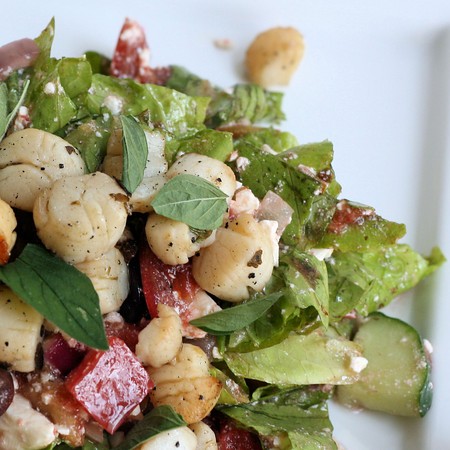
    The Ultimate Greek Salad with Grilled Scallops

    Jul 9, 2009 · 21 Comments

    Well, you know if you see "Ultimate" in my title, that it's time for another episode of Tyler Florence Fridays. But if you are a fan of Tylers (or, gulp, Tyler himself), you might be saying to yourself..."hey, wait a minute Tyler doesn't have an Ultimate Greek Salad with Grilled Scallops!" I know. But he does have an Ultimate Greek Salad with Grilled Calamari, and unfortunately what I don't have is calamari. I have nothing against calamari, some of my finest memories include calamari.

    No they don't. But they could.

    Sorry. I just can't get calamari around here. I can't even get good scallops, all I can get are those tiny things frozen in a bag. So, I subbed, tiny little scallops for calamari. Think of it as calamari with the hole filled in.

    This, of course, was wonderful. I've had Greek salads with grilled chicken, but never grilled scallops. They added a sweet and smokey flavor that was very enjoyable. Another winner from Tyler! This came from Tyler's Ultimate: Brilliant Simple Food to Make Any Time.

    The Ultimate Greek Salad with Grilled Scallops
    Serves 4

    1 pound of scallops

    vinaigrette
    ½ cup extra-virgin olive oil, plus more for grilling
    ¼ cup red wine vinegar
    4 garlic cloves, chopped
    1 tablespoon dried oregano
    1 tablespoon fresh oregano
    1 tablespoon fresh thyme leaves
    1 lemon, juiced
    Kosher salt and freshly ground black pepper

    4 tomatoes, seeded and cut into chunks
    1 medium red onion, sliced thin (I cut into chunks)
    1 medium cucumber, sliced thin (I cut into chunks)
    ½ pound feta cheese, crumbled
    ½ cup kalamata olives, pitted
    1 head romaine lettuce, torn into bite size pieces
    Lemon wedges, for garnish
    Fresh oregano leaves, for garnish

    To make the vinaigrette, whisk together the oil, vinegar, garlic, dried and fresh oregano, thyme and lemon juice; season with salt and pepper. Pour ½ of the vinaigrette over the scallops; set the other ½ aside while you make the salad.

    In a large bowl, add the tomatoes, onion, cucumber, cheese, olives, and romaine. Pour the remaining vinaigrette over the salad and toss to combine. Let marinate while you grill the scallops.

    Heat the grill or a grill pan and oil it lightly. Grill the scallops for 2 minutes on each side, no longer or they will be tough (I just kind of tossed them around in a grill basket). To serve, put the salad onto a large platter and top it with the grilled scallops. Garnish with fresh oregano leaves and lemon wedges.

    Dorie Greenspan's Garlic Scape Pesto

    Jul 3, 2009 · 15 Comments

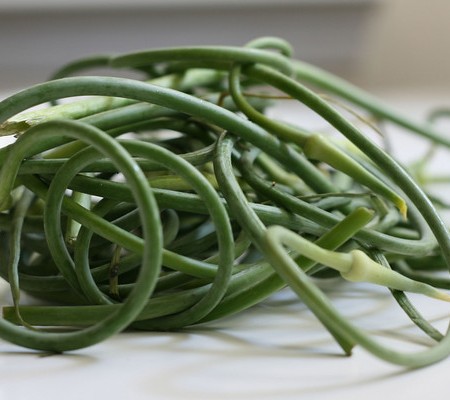
    Garlic scapes. They're popping up all over food blogger land lately. When my CSA handed me garlic scapes for 3 weeks in a row, I just kept putting them in a bag, till eventually I had a bag full that was just too big to ignore.

    When Dorie Greenspan's post on Garlic Scape Pesto popped up in my Google Reader, I'd found my answer. This smelled so good as I was making it, all garlicy and fresh and green. Since I didn't have any plans for it right now, I froze it in my ice cube tray. Popped the little frozen cubes of goodness out and put them in a ziplock. To be pulled out one flavorful cube at a time to use in soups, salsas, sauces, pizzas, beans, bruschettas...really, have I left anything out? Pestos are my favorite ingredient to have in my freezer, I currently have traditional basil pesto, garlic scape pesto, and parsley walnut pesto. I have plans for a cilantro and a mint pesto in the very near future.

    I'm not going to post the recipe, you'll have to follow the above link. Don't you love that picture of Dorie in that charming kitchen? It makes me heart for a small kitchen, only I'm sure mine wouldn't be that functional or nearly as charming.

    This will be my entry for this week's Weekend Herb Blogging hosted by Laurie at Mediterranean Cooking in Alaska.

    Lemon Spiced Bean Pickle

    Jul 1, 2009 · 21 Comments

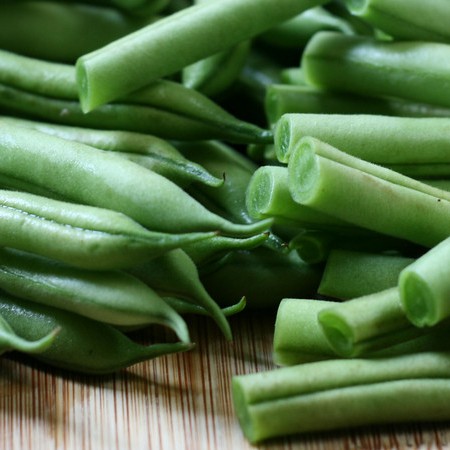
    To pickle or not to pickle, that is the question. What??? That's not your question? Seriously? Well, it's mine. I've become a pickling goddess, if you will. My latest foray into the pickling arena are these pickled green beans. I adore pickled green beans. In the winter, when they are all crisp and pickle-y, they remind me of summer.

    I also love to can, but I'm not a huge fan of pounds and pounds of things. I probably wouldn't even enjoy doing something with pounds and pounds of chocolate, though I'd be willing to try. So, anyway, The Complete Book of Year-Round Small-Batch Preserving: Over 300 Delicious Recipes works for me. You don't end up with jars and jars of things and you don't have to stand your kitchen peeling peaches for three hours (been there, done that).

    This recipe uses a mere two pounds of green beans, so when my bag of green beans from my CSA weighed in at just under that, I was set to go. This is really easy, the only thing I might mention is that it's easier to get your green beans all lined up nicely if you lay your jar on it's side. I plan on using these in the winter as a side dish or mixed in a nice three bean salad, plus they're good for just snacking.

    Lemon Spiced Bean Pickle
    Makes 3 pint jars

    1 lb green beans
    1 lb yellow beans (I used all green)
    2 ½ cups cider vinegar
    1 ¼ cups water
    1 tablespoon pickling salt
    1 tablespoon granulated sugar
    1 tablespoon pickling spice
    3 strips lemon rind

    Wash and trim the beans, so that they fit nicely in the jar (about 4 inches long).

    Combine the vinegar, water, salt, and sugar in a medium saucepan and bring it to a boil over high heat. Add the beans, cover the pot, return to a boil, and boil for 1 minute. Remove from the heat, drain the beans, reserving the liquid. Return the liquid to the saucepan and bring to a boil.

    Remove hot jars from the canner and place 1 teaspoon of pickling spice and 1 strip of lemon rind into each jar. Pack in the beans and pour the boiling liquid into the jars leaving ½ inch head space. Set hot lids on the jars and screw bands on. Lower the jars into the boiling water. Process for 10 minutes.** Remove jars from the water and let sit on the counter for 12 hours, check for seal.

    **If you've never canned before, do a google search on water bath canning, or better yet, get a simple canning book. Water batch canning is pretty simple, but there are some basic steps you follow.

    Easy White Bean Salad

    Jun 26, 2009 · 20 Comments

    White bean salad in a bright red bowl.

    This white bean salad is the perfect year round side dish! It goes great with winter braises and is perfect for a barbecue!

    Made with mostly pantry ingredients, this is an easy side dish you'll turn to time and time again.

    Beans, peppers, capers, mint and red onions in a bright red bowl.

    Beans are number one at our house! We use them in everything from main dishes, to side dishes and even snacks!

    It's no secret that beans are good for you - read this Healthy Benefits of Beans from Real Simple.

    Not only are beans good for you, they are delicious and economical!

    This mediterranean white bean salad uses mostly pantry ingredients and is easy to make year round! It's the perfect accompaniment to any roasted or grilled meat or fish. You can even add a can of tuna to it and make it a main dish!

    ...

    Read On →

    Mango Vinegar

    Jun 22, 2009 · 21 Comments

    Mango Vinegar
    You'll find so many ways to use this homemade Mango Vinegar - from salad dressings to deglazing pans.  It's delicious!  Mango Vinegar

    Mango Vinegar

    So, I sez to myself, "Self, what is this the summer of? Is it the summer of my herbs? No, that was last summer. Is it the summer of my cleaning out the garage? No, that lasted about 5 minutes two summers ago. Oh, wait, I remember this is the summer of my organizing. Which is coming along swimmingly. That is, if you swim like I do, with lots of floundering and sputtering and barely keeping my head above water. Though I do have one bookcase that simply looks amazing, don't worry I've taken pictures for proof, and I'll post at a later date. Must leave you waiting with baited breath.

    ...

    Read On →

    Quick Pickled Baby Turnips

    Jun 19, 2009 · 13 Comments

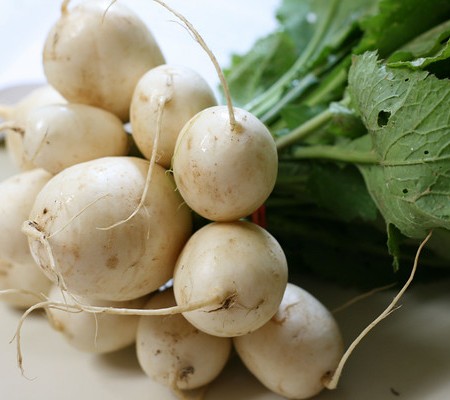
    Did you just gag a little when you read the word turnips in my title. It's okay. I understand. Believe me, if it were not for my CSA, turnips would not be passing through these lips. Seriously, you people that talk about planting your garden and how good your turnips are doing...really? I mean...really!? I find it so hard to believe that there are people who actually think, "Wow, I'm going to plant some turnips!" Of course, you're probably the same people who also plant lima beans, and there is simply no hope for you. None at all.

    So anyway, I have these turnips. And I admit they are kind of pretty, in their whole part of nature kind of way. So, I turn to my handy dandy new book The Joy of Pickling, Revised Edition: 250 Flavor-Packed Recipes for Vegetables and More from Garden or Market. Yes, I said, NEW. I do not consider this another cookbook purchase however. It's preserving, it's planning for the future, it's economical. So, let's drop the whole she-bought-another-cookbook train of thought, shall we?

    I decide to try the Quick Pickled Baby Turnips. I've got absolutely nothing to lose. If they are horrible, that's fine, I throw them out, and my opinion of turnips remains confirmed. If they are good or even tolerable, then it's a win! And guess what? They were pretty darn good. She says that they are ready after two days, but they were still kind of strong then. It's been about a week, and they are mellowing out a bit, and quite tasty. You can use them wherever you would normally use a pickle, like as a snack with sandwiches or cut them up into salads.

    Quick Pickled Baby Turnips
    Makes about 1 pint

    1 pound small turnips (1-2 inches in diameter) trimmed and peeled
    2 teaspoons pickling salt
    1 ½ cups water
    1 tablespoon seeded and minced hot or sweet chili pepper
    3 tablespoons sugar
    1 ½ cups rice vinegar or white wine vinegar

    Score the turnip on the top and bottom. Place the turnips into a bowl. Dissolve the salt in the water and pour this brine over the turnips. Let them stand for 30 minutes to one hour.

    Drain the turnips and return them to the bowl (I placed mine straight into the canning jar). Add the minced peppers. Combine the sugar and the vinegar and stir to dissolve the sugar. Pour this over the turnips. Cover the turnips and refrigerate. They are ready to eat after 2 days. If you keep them covered and refrigerated they will keep for several months.

    Lavender Sorbet

    Jun 11, 2009 · 21 Comments

    All is well in my world. I have righted a dreadful wrong. A wrong that I didn't even know existed. I had never cooked with lavender before. Oh sure, I cut it and bring it inside and admire it's prettiness and lovely fragrance. I've always been curious about it because everything that's made from it always seems so pretty and delicate, just like itself.

    Since it's summer and since my baking skills border on disastrous, I went with a frozen concoction. And for once, I left the bosom of David Lebovitz, and ventured out into the pile of frozen dessert recipes that I've printed and clipped and stole and borrowed. And low and behold, I found a recipe for lavender sorbet.

    This was wonderful. It was delicate and sweet and fancy. I felt like I should be sitting on a special porch. You know the kind you see in Better Homes and Gardens. The kind doesn't have mummified cat hairballs in it's corners. Did you know that if you leave a hairball outside long enough, it becomes this empty sort of shell of it's former self? Really all the gunky stuff evaporates away, and your left with this exoskeleton of a hairball. Sorry...I was talking about delicate and fancy and I got sidetracked.

    Anyway, make this and sit on your fancy porch.

    Lavender Sorbet

    1 cup sugar
    2 cups water
    1 tablespoon lavender flowers (food grade, or not sprayed with anything)
    2 ½ tablespoons freshly squeezed lemon juice
    2 tablespoons Vodka (I used Vanilla Vodka - my new favorite thing in the whole world)

    In a saucepan over medium heat, stir the sugar and the water together until the sugar dissolves. Add the lavender flowers and bring to a boil. Reduce heat to low and simmer for 5 minutes. Remove the pan from the heat, cover, and let steep for 10 minutes.

    Place a fine strainer over a bowl and pour the syrup mixture through it, straining out the flowers. Add the lemon juice and the vodka and stir to combine. Chill thoroughly.

    Process in your ice cream maker per it's instructions.

    This will be my entry for this week's Weekend Herb Blogging hosted by Katie at Eat This.

    Tyler Florence - Ultimate Barbecued Chicken

    Jun 4, 2009 · 30 Comments

    Do you have a best friend? Well, call him (or her) and tell them, sorry, but you have a new best friend. That would be me. You new best friend. As my new best friend, you might want to know ...my likes - chocolate, cats, and the color pink...dislikes - okra, lima beans, and National Geographic Wildlife Shows (not all the shows, but the ones where the innocent, frolicking, little antelope gets killed by totally unremorseful lion, and since you never know when they are going to spring that on you, I avoid them all).

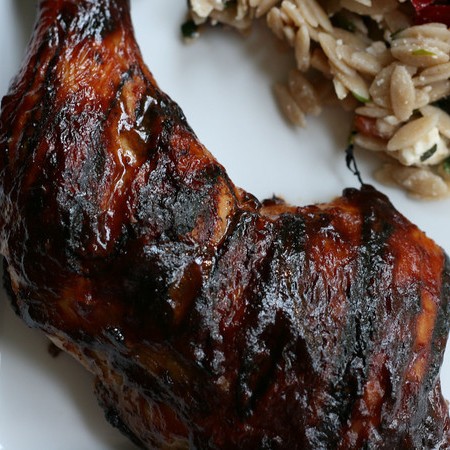
    Why am I your new best friend? Well, I am introducing you to the best barbecued chicken recipe in the whole world, that's why. I'm not kidding. I don't make these statements lightly. This is seriously the best barbecued chicken recipe ever. And I am not just saying that because it's Tyler's and because there is always the possibility that he may feel the need to come thank me. In person.

    You begin by brining the chicken. A step I usually skip. Never again. It makes the chicken so flavorful and moist. It really complements the sauce, so it becomes almost one flavor the chicken and the barbecue sauce as opposed to chicken...and sauce. And speaking of sauces. What can I say about a sauce that has you begin by wrapping bacon around thyme? I repeat, bacon around thyme. The sauce was amazing, rich and thick, and sweet and smokey and everything you want a barbecue sauce to be.

    The Ultimate Barbecued Chicken
    from
    Tyler's Ultimate: Brilliant Simple Food to Make Any Time

    Brine:
    2 quarts water
    2 tablespoons kosher salt
    ¼ cup brown sugar
    2 garlic cloves, smashed with the side of a large knife
    4 sprigs fresh thyme
    6 chicken legs and thighs, still connected, bone in, skin on, about 10 ounces each
    The Ultimate Barbecue Sauce:
    1 slice bacon
    1 bunch fresh thyme
    Extra-virgin olive oil
    ½ onion, chopped
    2 garlic cloves, chopped
    2 cups ketchup
    ¼ cup brown sugar
    ¼ cup molasses
    2 tablespoons red or white wine vinegar
    1 tablespoon dry mustard
    1 teaspoon ground cumin
    1 teaspoon paprika or smoked paprika if available
    Freshly ground black pepper

    For the brine, in a mixing bowl combine the water, salt, sugar, garlic, and thyme. Transfer the brine to a 2-gallon sized re-sealable plastic bag. Add the chicken, close the bag and refrigerate 2 hours (if you've only got 15 minutes, that's fine) to allow the salt and seasonings to penetrate the chicken.

    Meanwhile, make the sauce. Wrap the bacon around the bunch of thyme and tie with kitchen twine so you have a nice bundle. Heat about 2 tablespoons of oil in a large saucepan over medium heat. Add the thyme and cook slowly 3 to 4 minutes to render the bacon fat and give the sauce a nice smoky taste. Add the onion and garlic and cook slowly without coloring for 5 minutes. Add the remaining ingredients, give the sauce a stir, and turn the heat down to low. Cook slowly for 20 minutes to meld the flavors. Once the sauce is done cooking, remove about 1 ½ cups of the sauce and reserve for serving along side the chicken at the table. The rest of the barbecue sauce will be used for basing the legs.

    Preheat oven 375 degrees F.

    Preheat a grill pan or an outdoor gas or charcoal barbecue to a medium heat. Take a few paper towels and fold them several times to make a thick square. Blot a small amount of oil on the paper towel and carefully and quickly wipe the hot grates of the grill to make a nonstick surface. Take the chicken out of the brine, pat it dry on paper towels. Arrange the chicken pieces on the preheated grill and cook, turn once mid-way, and cook for a total of 10 minutes. Transfer the grill marked chicken to a cookie sheet and then place in the oven. Cook the chicken for 15 minutes, remove it from the oven and then brush liberally, coating every inch of the legs with the barbecue sauce and then return to the oven for 25 to 30 more minutes, basting the chicken for a second time half way through remaining cooking time. Serve with extra sauce.

    This will be my entry for this week's Tyler Florence Fridays.

    BFF,

    Pam

    • « Go to Previous Page
    • Page 1
    • Interim pages omitted …
    • Page 67
    • Page 68
    • Page 69
    • Page 70
    • Page 71
    • Go to Next Page »

    Primary Sidebar

    Pam Greer from Sidewalk Shoes

    Hi, I'm Pam. I'm the person who plans whole vacations around where to eat and drink. Beautiful scenery is optional.

    More about me →

    Featured in:

    Collage of website titles

    Sheet Pan Suppers

    • Close up of chicken and vegetables on a sheet pan.
      Honey Balsamic Chicken
    • Tray Baked Salmon and Green Beans
    • Close up of roasted sausages and vegetables.
      Sheet Pan Roasted Sausage and Vegetables
    • Two photos of sheet pan dinners with text overlay.
      15 Easy and Delicious Sheet Pan Dinners
    See more Sheet Pan Suppers →

    Instant Pot

    • Two bowls with toppings of peppers, sauce, tomatoes, cilantro and more.
      Instant Pot Chickpea Mediterranean Bowl
    • Close up of a bowl of black beans topped with cilantro salsa.
      Easy Instant Pot Black Beans
    • Bowl of pineapple rice garnished with cilantro.
      Instant Pot Pineapple Rice
    • Bowl of pork noodle soup topped with radishes and green onions.
      Instant Pot Asian Pork Noodle Soup
    See more Instant Pot →

    Sidewalk Shoes is a participant in the Amazon Services LLC Associates Program, an affiliate advertising program designed to provide a means for sites to earn advertising fees by advertising and linking to amazon.com.

    Footer

    ^ back to top

    About

    • Privacy Policy
    • About Me
    • Contact me!

    Disclaimer

    Website Disclaimer

    Copyright © 2024 Sidewalk Shoes